Fundamentals of Tone Production
When we hear a particular musician play and are immediately drawn into the music we may be attracted to their note choices, their feel, the way they may blend with the other musicians, and their individual and unique tone.
I might consider the first time I heard the great iconic jazz bassists, Ray Brown and Paul Chambers. I was attracted to not only the notes they played, their rhythmic feel, and their unique and individual concepts to music, but also the tone of their instruments. Big. Warm. Clear. Driving. Both players are special and unique, each with their own tone and sound on their instrument. Tone is what draws the listener in.
Tone Production
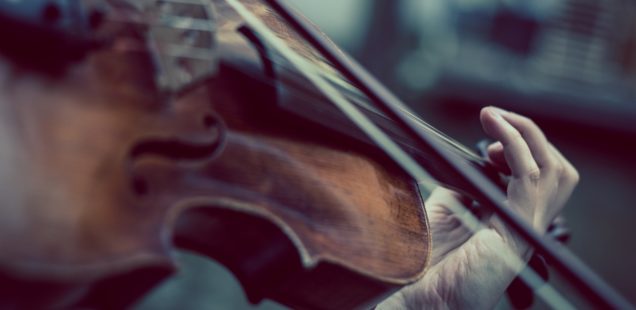
When teaching my students about bow tone and how to produce a pleasing tone I share with them an acronym that I stumbled across somewhere along in my teaching – W.A.S.P.
The acronym can be defined as bow weight, bow angle, bow speed, and bow placement. Perhaps if students are struggling with producing a sound they may need to address one of these areas of their sound production.
As string educators we understand and regularly assess these aspects of our students tone. The goal, of course, is to help our students assess their own personal tone production and strive to develop the skills and concepts necessary for producing a pleasing tone. So much goes into the mechanics of producing a pleasing tone on a string instrument – the act of producing a sound requires assessment of these four areas – which is a complex task for a musician and requires much practice. As educators, helping our students begin to understand, assess, and evaluate their tone and the mechanics of their tone is our task.
Of course, a pleasing tone is difficult to produce if students are struggling with posture, playing position, or producing a comfortable bow hold. If this is the case, these areas of a students playing need to be addressed. Nonetheless, the idea of bow weight, bow angle, bow speed, and bow placement can serve to be a guide for students as they develop their tone.
Bow Weight
Bow weight has to do with the arms natural weight on the string. To illustrate the concept of weight to students I have had them experiment with a few ideas.
- I have had them raise their bow arms slightly above their strings and then take a big, deep breath, as if their body is to go slightly limp for a moment. I then have the students drop their bow arms back on the string. Their arm should be heavy on the string, creating a natural weight or heaviness on the string. Repeat several times so students can practice this concept of gravity producing a natural arm weight on the string
- Have students imagine adding weight to the string. I have them picture what it would be like to have ten pounds of weight, twenty pounds of weight, fifty pounds of weight on the string. I have them experiment with adding these various increasing amounts of weight.
Weight is important to sound production for although a student may have solid placement, bow angle, and speed – the bow needs to be “in” the string in order to produce a present sound. In order for the bow to be “in” the string, the student must be applying weight, almost as if the bow is “super glued” to the string. If someone were to come up and attempt to tap your bow off the string there should be some resistance to their attempt. Some element of weight should be present and the bow should bounce back onto the string.
Bow Angle
Bow angle has to do with the position of the bow on the string. The position of the bow should generally be parallel to the bridge. Many students struggle with moving the bow parallel to the bridge by dropping the tip of the bow or bringing the tip to far upwards toward the scroll so that the bow moves across the string in a hooked manner. In order to facilitate good bow angle have students practice the following:
- Have students set their bows parallel to the bridge and draw a very slow moving bow. The focus should be on moving the bow parallel to the bridge throughout each entire stroke.
- Have students create extremes where they move the frog of their bow up and down so that the tip of the bow raises and lowers across the string. Finally, have them settle on the point in which the bow is totally parallel to the string.
Bow Speed
Bow speed is how fast the bow moves across the string. Our role is to help students develop the “correct” speed needed for each bow stroke or rhythmic value. Many beginners “run out” of bow or don’t have enough bow when playing longer note values or at a slower tempo. Bow speed depends upon the stroke or rhythm, but helping students develop the concept of bow speed is important to general tone production.
- Have students move the bow from frog to tip while holding four full beats. Have them move the bow at a very slow speed. Set a metronome to be very consistent. Repeat the same exercise, but have students move their bow from frog to tip while counting three, two, and one beat per bow stroke.
- Have students experiment with playing at the lower, middle, and upper half of the bow only to identify these sounding points. Play various rhythms and note where each part of the rhythm should settle in the bow. Have students play a variety of rhythms such as the ones I created in my Bowings for Right Hand Development worksheet series to identify the speed needed in the bow for each type of rhythm.
Bow Placement
Bow Placement refers to the position of the bow between the fingerboard and bridge. Placement of the bow greatly affects tone through volume and timbre. Closer to the fingerboard generally produces a softer volume whereas closer to bridge produces a louder volume. Similarly, closer to the bridge can produce a brighter timbre as well. Many educators have described bow placement through the ideas of lanes. The first lane is closest to the bridge and each lane moving further and further away from the fingerboard to the bridge. Each lane produces a different tone and should be experimented with.
- Have students experiment using different “lanes.” Have students put their bow in lane 1 – closest to the fingerboard. Have them describe this sound and it’s tone. Have the students move their bow into lane 2, lane 3, and lane 4, and so on and describe the sound of each lane.
Conclusion
Mastery of all four of these aspects of the bow is the general goal. Organizing students who are struggling with any of these four areas of their bow stroke to practice in front of a mirror can be very helpful. They will be able to see exactly how to adjust their bow angle, what speed to move their bow, and so on.
To keep things very simple and to focus solely on tone production have students play open strings. To regularly develop students bow sound, create a warm up routine to help facilitate solid tone production in the bow.